Cheesy Chicken and Potato Casserole – Crockpot Recipe – So easy a kid can make it!

Potatoes 1

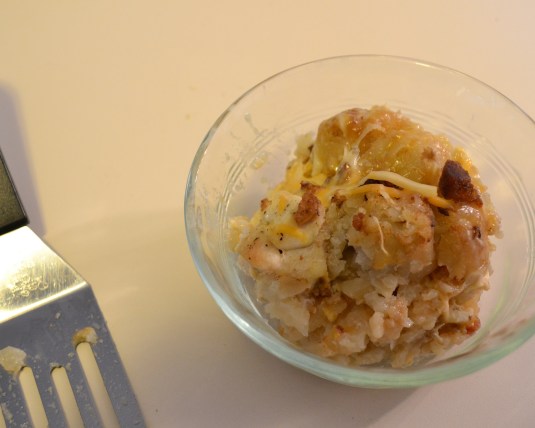
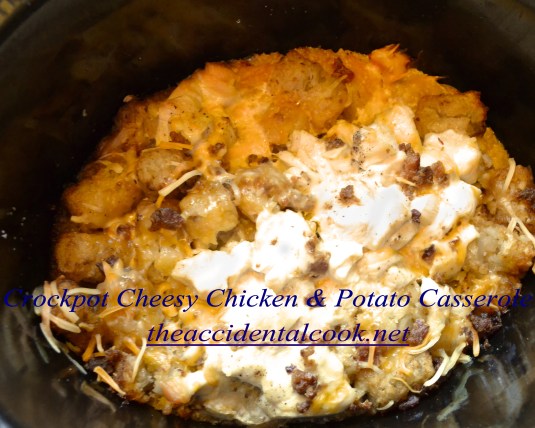
Before I get into this blog post, I must apologize for the horrendous pictures.   I am still learning how to use my camera, and the white chicken in this dish completely didn’t turn out correctly.  Oh well, I’m learning.

There are some days when my children surprise me.  Yesterday was one of those days.  I had thawed a bag of chicken to be used for dinner, but completely forgot to put it in the crockpot before I left for work. When my husband called me to ask what needed to be done with the chicken, I scrambled to think of what we could do with the chicken once we got home.  He suggested that I call the kids and have them put together their favorite crockpot recipe.  I was very leery about asking 2 teenagers to do anything while they are on Spring Break, much less asking them to COOK something.  I decided I would call them later to see if they would be so kind as to prepare dinner for the family, fully expecting to hear groaning and complaining.  To my surprise, I received a call from my son asking what he needed to do with the chicken.  WHAT!?  Could this be true?  My husband had called my son to ask him to make dinner, and he said “yes.”  I’m still shocked.  After explaining that “slow cooker” and “crockpot” were exactly the same thing, he was ready to prepare dinner.  He didn’t require any additional help.

I was very excited when I arrived home and, 1) my house was still in tact, 2) dinner was finished, 3) the teenagers had even folded some laundry.  I felt like I had won the lottery!

If you are looking for a quick and simple dinner, this should be your go-to recipe.  It is one of our favorites.  One important note about this is that it only requires 4-5 hours of cooking time on low, and it won’t last long if you leave it on warm after it is done.  It dries out quickly.

p.s. This recipe is “naturally” gluten free

p.p.s. My kids really didn’t fold any of the laundry.  My mom stopped by for lunch and decided to do me a favor.  Thanks mom!

Potatoes 2

Cheesy Chicken and Potato Casserole for the Slow Cooker

Ingredients:

1 bag frozen tater tots (32 ounces)

1/3 cup bacon pieces

4 boneless/skinless chicken breasts (thawed, diced, uncooked)

2 cups shredded cheese (cheddar, colby, mexican, etc)

3/4 cup milk

Directions:

  1. Cover crockpot with plastic liner or spray with cooking spray.
  2. Layer half of the tater tots in the bottom and sprinkle with 1/3 of the bacon pieces and 1/3 of the shredded cheese.
  3. Add chicken on top of the previous layer and sprinkle with 1/2 of the remaining cheese and bacon pieces.
  4. Add the remaining taters tots and top with remaining bacon and cheese.
  5. Pour milk over the top.
  6. Cook on low for 4-5 hours or until chicken is fully cooked.  Do not overcook or leave in crockpot on warm once casserole is finished.
Mashed Potatoes – Recipe for Mom’s Crazy Cooking Challenge


I recently joined a challenge that asks us to explore recipes from other bloggers. This first challenge was to make mashed potatoes using a recipe from someone else’s blog.

Photobucket

I’m pretty partial to my own mashed potato recipe, so it was tough to decide on a different recipe. The only real difference between the recipe I found at Life’s Ambrosia and mine was the use of half and half. Other than that, it’s identical.


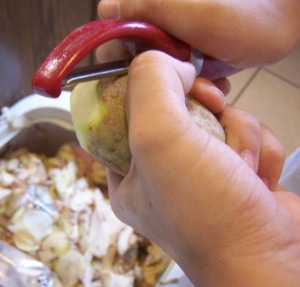
My little sous chef helped peel potatoes, in fact, he peeled most of them. I chopped them this time, but he usually does that as well.


We prepped the potatoes ahead of time, so they had to be submerged in water so they wouldn’t turn brown before we used them.


These potatoes are really yummy and creamy. They aren’t complicated to make. I did change it up a bit because I only had heavy cream, but I made the appropriate adjustments. This is the perfect mashed potato recipe….and it’s super easy. One look at these yummy potatoes will make you wish you had made some already.


Powered by Linky Tools

Click here to view all of the other wonderful potato recipes.


Mashed Potatoes
Recipe adapted from: Life’s Ambrosia

Ingredients:
8 russet potatoes – peeled and cubed
6 tbsp. butter
1 cup half and half (or 1/2 cup milk + 1/2 cup heavy cream)
salt and pepper to taste

Directions:
Place cubed potatoes into large pot of boiling water. Let boil until potatoes can be pierced and broken with a fork. Drain potatoes.

Add butter and half and half to bowl of stand mixer. Place potatoes in bowl on top of butter and milk and let sit for one minute to allow butter to melt.

Turn mixer on medium speed and whip for 2 minutes. Add in salt and pepper during mixing. Taste after 1 minute to determine if you need more salt. Serve immediately – plain or with your favorite gravy.

Slow Cooker Turkey Breast

Happy Friday to everyone! I am going to be putting together a wonderful Thanksgiving menu that’s perfect for people that don’t have a lot of time and/or don’t know how to cook. This menu is going to include recipes that I have made in the past, but I made them before I started my blog. In other words….no pictures. BOOOOO! I will put together the entire menu, but I need to get each recipe posted first.

This first recipe is something that I made a few years back when I hosted Thanksgiving at my house for the hubby’s family. I’ve also made it several other times, but I think it’s important that you know I did actually make it for Thanksgiving. Everyone loves this recipe. It is fool-proof! If you are scared to make a turkey for fear it will be gross and dry, try this recipe. It only uses the breast portion of the turkey, so if you have a small family, this will be the perfect size. I would say that this will easily feed 6 people. Make sure you have a large crockpot because this will not fit in the smaller ones.

Enjoy!

Slow Cooker Turkey Breast
Recipe by: The Accidental Cook
Printable Recipe

Ingredients:
1 – Whole turkey breast (6-8 lbs.) – These are found in the freezer section with the frozen, whole turkeys.
2 – Dry onion soup mix packages
1 yellow onion – cut in quarters
3 celery stalks – cut in sections
1/2 cup chicken broth
4 – tablespoons butter

Directions:
Spread onion soup mixture on the outside and inside cavity of the turkey. Place the onion and celery on the inside of the turkey and underneath and around the turkey if you have space in your crockpot. Pour the chicken broth into the bottom of the crockpot being careful not to pour over the turkey and wash off any seasoning. Cut butter into 4 squares and place them on top of the turkey. Cook on high for 1 hour and then on low for another 7-8. Remove turkey from crockpot and let rest for 10-15 minutes. Discard the onion and celery. Slice turkey and serve.

Cheri’s Slow Cooker Chili – My new favorite halloween recipe


Why did the Invisible Man flunk out of school? Because the teacher kept marking him absent! This was the best joke that I heard this year….and honestly, it wasn’t that great. I heard all of the “oldies but goodies” but there still wasn’t anything that made me laugh uncontrollably. Well, there was that 2-year-old that said, “whole bunch” and held up his pumpkin after I gave him 2 pieces of candy. Apparently he wanted more. It was cute, and it worked, but his parents were mortified. Hey, at least he knows how to ask for what he wants.

What’s Halloween without chili? It’s like Thanksgiving without turkey, Christmas without snow, St. Patrick’s day without beer, Mardi Gras without….um, well, I’ll skip that one. Each year I make chili for Halloween. I take that back, the hubby usually makes beef chili and I make my chicken chili. This year we decided to find a recipe for chili and make a big pot of only 1 kind of chili. I searched through Allrecipes and came across one of their highest rated recipes. Of course I had to adapt it to make it my own, including making it a slow cooker recipe. If I can put something in the crockpot to cook all day, I will do it!

The hardest part of this recipe is chopping up all of the fresh veggies. You could probably put it all in a food processor or buy pre-chopped to save time. Either way, this recipe is pretty simple and very forgiving. If you don’t have the beans that the recipe calls for, use what you do have…within reason. I’m pretty sure that you wouldn’t want to use baked beans or garbanzo beans, but hopefully you already knew that.

I adapted my version to be gluten free by using this bouillon. But you can use regular bouillon if you don’t have an issue with gluten.

This recipe makes a TON of chili, so be prepared to feed a crowd or have tons of leftovers. I guess I need to start researching recipes that will help me use up my leftover chili. We’ve already done chili dogs, so maybe some chili mac??? Anyone want to come over for some chili?!

This recipe has been shared at:
A Southern Fairytale
11th Heaven’s Homemaking Haven


Cheri’s Slow Cooker Chili
Adapted from: Allrecipes.com
Printable Recipe

Ingredients:
2 pounds ground beef
1 1/2 pounds bulk Italian sausage
3/4 cup water
4 cubes beef bouillon
1/4 cup chili powder
2 (15 ounce) cans chili beans, drained
2 (15 ounce) cans black beans, drained
2 (28 ounce) cans petite diced tomatoes with juice
1 (6 ounce) can tomato paste
1 large yellow onion, chopped
3 stalks celery, chopped
1 orange bell pepper, seeded and chopped
1 yellow bell pepper, seeded and chopped
1 (4 ounce) can diced green chiles
1 tablespoon Worcestershire sauce
1 tablespoon minced garlic
1 tablespoon dried oregano
2 teaspoons ground cumin
2 teaspoons hot pepper sauce
1 teaspoon dried basil
1 teaspoon salt
1 teaspoon ground black pepper
1 teaspoon cayenne pepper
1 teaspoon paprika
2 teaspoons white sugar

Directions:
In large skillet, brown ground beef and sausage. Drain and add to large crockpot. Dissolve bouillon in water to form a concentrated broth and pour into crockpot. Add the reminder of the ingredients to the crockpot, stir to combine and cook on low for up to 8 hours. *I prepared this the night before and just stored in the fridge and put it in the crockpot the following morning.

Slow Cooker Roast Beef – Tastes like it took longer than 5 minutes to prepare


Happy November! Well, maybe it’s not happy for some. The way I look at it is that it brings me one month closer to spring. That’s the only thing I look forward to once October ends.

Last night was Halloween, and, as always, my neighborhood was CRAZY. We went through 8 big bags of candy! The kids had so much fun. I made homemade chili (recipe tomorrow) and apple pie (recipe soon). My mother-in-law made white chicken chili, so I will take pics and post that later as well. Gees, I have a lot of blogging to do this week.

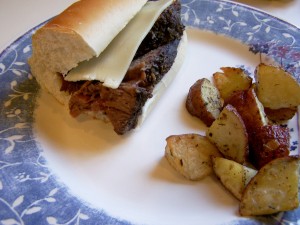
So this recipe isn’t a recipe that I made for Halloween. This is a recipe that I make on a regular basis because the hubby loves it. I love it too, especially because it’s a crockpot recipe. I have always loved French dip sandwiches, but I never knew how to make the perfect roast beef for them. This recipe does it. All you need are some good French rolls and any cheese that you prefer with your roast beef and you will have a quick and easy roast beef sandwich. This can be prepared the night before and then added to the crockpot in the morning, or it can be prepared the same day.

Hunk of Meat Mondays

Slow Cooker Beef Dip Sandwiches
Adapted from: allrecipes.com
Printable Recipe

Ingredients:
5 pound beef chuck roast
1 1/2 tablespoons minced garlic
1 tablespoon dried rosemary
3 bay leaves
1 cup soy sauce (I use GF soy sauce)
6 cups water

Directions:
In large bowl, combine all of the ingredients except the bay leaves and roast. Stir to combine. Add roast to bowl, cover and refrigerate overnight if possible to marinate the meat. This is not a necessary step, but I find that the flavor is better if you can let it sit in the marinade overnight.

Add the beef, marinade and bay leaves to a large crockpot. Cook on low for 8 hours.


Remove roast from crockpot. Let meat rest for 5 minutes. Slice and spoon some of the leftover liquid from the crockpot onto the meat. Serve warm or cold.

Roasted Red Potatoes – One of the easiest side dishes I make


Is there a website that just sells 1 shoe? There has to be. I couldn’t possibly be the only person out there that has a dog that chews up just 1 of their shoes on a regular basis. I wish someone could explain to me why our dog only chews up 1 shoe and they are only MINE. The children could leave shoes on the floor for a month, but if I leave a pair of shoes out, she takes only one and tears up only the important parts like the tips of the heel or one of the loops for the shoe strings. Why can’t she just chew up the laces??? Anyway, if you find a website that sells single shoes, let me know. I have a closet full of single shoes.

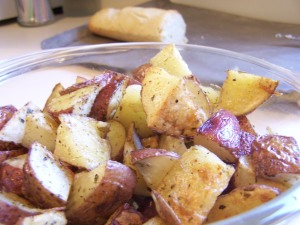
When I first started cooking, I had no idea what “roasting” potatoes meant. I thought it was some complicated cooking technique that was too much for me to handle. Um, wrong! Roasted red potatoes are one of my family’s favorite dishes, and it’s the easiest way to add potatoes to a quick, weeknight meal. These can be prepared in 5 minutes. The thing that takes the longest is baking them. This recipe is very versatile and can be used with veggies as well. I’ve added squash, carrots, sweet potatoes and asparagus and they all taste great. Potatoes take longer to bake, so reduce the cooking time for veggies. I served these with the hubby’s favorite slow-cooker roast beef (recipe coming soon).


Roasted Red Potatoes
Recipe by: The Accidental Cook
Printable Recipe

Ingredients:
1/4 cup olive oil
2 tsp. garlic powder
2 tsp. italian seasoning
2 tsp. salt + more for seasoning
3 cups red potatoes, cubed

Directions:
Preheat oven to 425 degrees. Line a baking sheet with aluminum foil and spray with cooking spray.

In large bowl, mix olive oil, garlic powder, italian seasoning and 2 tsp. salt.


Add potatoes and stir to coat.


Pour potatoes onto prepared baking sheet. Sprinkle with additional salt (based on taste).


Place in oven and bake for 20 minutes. Stir potatoes and continue to cook for an additional 10-15 minutes. Cooking time varies depending on the size of your potatoes. The potatoes are done when they are crispy on the outside. Serve immediately.

Cheesy Chicken Pot Pie – Gluten free!


My blog should be named…Everyday I dream of Bread. I have an issue with bread. I love everything about it…I love to eat it and I love to make it. There are so many things you can do with bread. It can be used for sandwiches, Thanksgiving stuffing, French toast, bread crumbs, croutons, and almost anything else that is awesome.

The worst part about having Celiac disease, at least what I think would be the worst part, is not being able to eat regular breads. The gluten-free breads are ok, but they aren’t stellar. We pretend like they taste good, and to someone that can’t eat the regular stuff, it’s better than nothing, or a poke in the eye.

So this morning, the hubby suggested that we have chicken pot pie for dinner. I started looking around for a gluten-free recipe and then I remembered that I had just bought a box of gluten-free Bisquick mix. The main reason that I ever started buying Bisquick was to make the cheddar bay biscuits that they serve at Red Lobster. Which gave me the idea that became this recipe. Could I top the pot pie mixture with a layer of cheddar bay biscuits? Oh yes I can!!! Everything about this recipe was perfect, except the hubby thought the topping was too thick, so I posted the recipe for half of the topping mixture, and that should be the perfect amount.

You could make this recipe using regular flour and regular Bisquick, just decrease the amount of milk by half in the topping mix. If you or someone you know has issues with gluten, make this for them. It’s so good that I had 3 helpings.
YUM!


Cheesy Chicken Pot Pie
Recipe by: The Accidental Cook
Printable Recipe

2 tablespoons butter
1/2 cup onion, chopped
1 tablespoon garlic, minced
1/4 cup gluten-free flour (I used Andrea’s)
3 cups chicken broth
Salt, to taste
Pepper, to taste
1 cup cooked chicken, chopped
1/2 cup frozen peas, thawed
1/2 cup whole kernel corn
2 whole carrots, chopped
2 medium russet potatoes, peeled and diced

1 1/4 cups gluten-free Bisquick
2 tablespoons cold butter
1/2 cup shredded cheddar cheese
2/3 cups cold milk
1/4 teaspoon garlic powder

2 tablespoons butter, melted
1/2 teaspoon garlic powder
1/4 teaspoon dried parsley
1/8 teaspoon salt

Directions:

Preheat oven to 400 degrees.

In large skillet over medium/high heat, melt butter. Add onions and sauté until translucent. Add garlic and sauté for another minute. Sprinkle the onions with flour and stir until the flour is completely mixed into the onions. Slowly whisk in the chicken broth, and continue whisking until the mixture starts to simmer and becomes thick. Add in the chicken, peas, corn, carrots and potatoes. Add salt and pepper to taste. Continue simmering over low heat and prepare the top crust.

Pour Bisquick in a large bowl. Add in the chilled butter and use a pastry cutter, pizza wheel or 2 knives to cut in the butter to the Bisquick until is resembles small pebbles. Add in milk, cheese and garlic powder and mix until just combined.

Remove vegetables from heat and pour into a 9×9 baking dish. Spoon the topping mix over the top of the vegetables and spread to cover the entire dish.

Place in preheated oven and bake for 15 minutes. Place a cookie sheet underneath the pan to catch any drippings.

Meanwhile, melt 2 tablespoons butter and add garlic, parsley and salt. After the pot pie has been baking for 15 minutes, brush the top with the butter mixture and return to the oven for another 5 minutes.

Remove from oven and let stand for 10 minutes before serving.

Chocolate Peanut Butter Cookies – For Week 5 of the 12 Weeks of Christmas Cookies


What a week this has been!! So many good things have happened, along with a few bad things scattered in. My hometown baseball team making it to Game 7 of the World Series has definitely washed away all of the bad. Game 6 will go down as one of my favorite games of all time! I am so glad that the Cardinals won, because if they hadn’t, I would still be thinking about the horrible kitchen debacle that I had last night.

I am participating in this great challenge called “The 12 Weeks of Christmas Cookies” hosted by Brenda at Meal Planning Magic. I have had so much fun making new cookies each week and sharing them with you. I had planned to make Oatmeal/Raisin cookies for Thursday’s post, but somewhere in the day I changed my mind. The hubby has to eat gluten-free, and I knew that it had been a while since I had made him something sweet, so I decided to make flourless chocolate cookies with mini peanut butter cups on top.

This was all good in theory, but I’m fairly certain that the recipe I got from another blogger was off on the amount of ingredients. These cookies were a mess from the moment I started putting them on the cookie sheet. They were too runny, so I added more powdered sugar thinking that this would help. No dice! They ran together and created a very strange and large cookie that was full of air and had an odd consistency. The unfortunate thing about this is that they actually tasted good! They just looked like a steaming pile of poo. Trust me, we ate the large mess of cookie-like stuff, but there is no way I would ever post something that turned out so ugly on a post for Christmas cookies. It wouldn’t be fair to you. Christmas cookies are supposed to be pretty.

I decided to go back into the archives and bring out a good recipe. This is one of the first recipes that I ever posted. I know it hasn’t been that long since I started my blog, but hopefully you are willing to give this recipe a try if you passed it over the first time.

These cookies are “naturally” gluten-free because the original recipe doesn’t call for flour. This is a regular recipe, so don’t pass on it because it’s gluten-free. These cookies are not a cakey cookie. They are more soft and chewy, which is how I like my cookies. Don’t get me wrong, I like cookies that have a cake consistency as well, but there is nothing better than a chewy cookie…it reminds of the corners of brownies. YUM!

View all of the other bloggers’ recipes, click here.


Peanut Butter Cookies with Chocolate Drizzle
Adapted from: Gluten Free Girl
Yields 2 dozen cookies
Printable Recipe
Ingredients

1 cup creamy peanut butter
1 cup crunchy peanut butter
1 1/2 cup granulated sugar
2 tsp baking powder
2 eggs
1/2 cup granulated sugar + an additional 1/2 cup sugar for rolling
1 cup chocolate chips

Directions:

Preheat oven to 350 degrees. Cream together peanut butters and sugar. I used my stand mixer, but you can also mix by hand. Add in the baking powder and eggs and mix until combined evenly.

Pour additional 1/2 cup sugar into a small bowl. Roll cookie dough into small balls and then rolls in the bowl of sugar. Place dough balls onto cookie sheet and flatten slightly with a fork. Bake for 10-12 minutes. IMPORTANT: Leave the cookies on the cookie sheet for 5 minutes before moving to a cooling rack. Do not remove the cookies from the cookie sheet before this time is up or they will not have the right texture.

Melt the chocolate chips in the microwave by placing them in a microwave-safe bowl and cooking on high for 10 seconds. Stir and cook an additional 10 seconds. Follow this method until they chips are completely melted. Once the cookies have cooled, use a fork or spoon to drizzle the chocolate over the top.

Powered by Linky Tools

Click here to enter your link and view this Linky Tools list…

Cheri’s Homemade Lasagna – Cheesy, yummy, and just plain good!


Comfort food! We all have our opinion of what comfort food should be. What’s yours? Mine are a big pot of chicken and dumplings, mashed potatoes, peanut butter and jelly sandwiches, Campbell’s chicken noodle soup and lasagna. If you’ve never made homemade lasagna, you cannot fully appreciate the time that goes into preparing it, especially if you make your sauce from scratch as well. I don’t care how many times you see commercials advertising delicious homemade lasagna from a box, or canned lasagna – Um really? – there is nothing that will beat a good slice of freshly prepared lasagna. Now, I didn’t go all out and make my noodles from scratch, but everything else was made from ingredients and not a mix from a box.

My Sous Chef was super excited about making lasagna. He wanted to make it without my help. I gave him the task of preparing the tomato sauce, and provided him with a simple recipe to use. He followed the instructions perfectly, but then I went behind him and added in a little of this and a little of that to make it our own special sauce. It really turned out great. I was so proud of him and a little proud of myself for creating my own recipe that didn’t completely fail! Woo hooo!

Feel free to use “no-boil” noodles for your lasagna – I did. Mine were actually gluten-free, no boil noodles (details here).

I made an entire pan of this lasagna and planned to take a picture of a cut piece, but it never happened. The lasagna was gone by the next evening. The hubby had 3 pieces for lunch! I told him that he would have to workout for at least 3 extra hours to work it off! This recipe isn’t something you want to eat everyday. I hope you will make this for your family. It really is worth the extra effort.

I have included the recipe below with step-by-step photos to help you with layering the lasagna. A link to a printable version (no pics included) can be found below.

Cheri’s Homemade Lasagna with Crockpot Tomato Sauce
Recipe by: The Accidental Cook
Printable Recipe
Ingredients

Tomato Sauce:
2 cans tomato paste (6 ozs.)
2 cans diced tomatoes (14.5 ozs.)
1 tbsp. granulated sugar
2 tsp. salt
2 tsp. oregano
2 tsp. parsley
1 bay leaf
1 lb. Italian sausage
1 lb. ground beef
1 tbsp. chopped garlic
½ cup chopped onion

Lasagna:
1 box Lasagna Noodles
16 ozs. Small curd cottage cheese
1/4 cup grated parmesan cheese
1 egg, lightly beaten
2 cups shredded mozzarella cheese

Directions:

Add tomato paste, diced tomatoes, sugar, salt, oregano, parsley and bay leaf to large crockpot. Cook on low for 5 hours.

Meanwhile, in a large skillet, add Italian sausage, ground beef, garlic and onions and cook until all meat is browned. Drain and then add meat mixture to the tomato mixture in the crockpot. Continue cooking for 4 hours.

Lasagna Preparation:

Prepare lasagna noodles according to directions on box. I used “no-boil” noodles.

Preheat oven to 375 degrees. Prepare a large baking dish (9×7) by spraying with a non-stick cooking spray.

In a small bowl, combine cottage cheese, parmesan cheese, and egg.

Layer 1 – spoon a generous amount of tomato sauce into baking dish.


Layer 2 – add lasagna noodles to cover the first layer of sauce.


Layer 3 – Spread half of the cottage cheese mixture over the top of the noodles. You can sprinkle with some Italian seasoning if you’d like.


Layer 4 – Add a generous amount of the tomato sauce to completely cover the cheese below.


Layer 5 – add lasagna noodles to cover the previous layer.


Layer 6 – Spread the remainder of the cottage cheese mixture over the top of the noodles.


Layer 7 – Add the remainder of the tomato sauce mixture. OOPS! I started adding the cheese before I took the picture. Pretend like the cheese isn't there.


Layer 8 – Top with the 2 cups of shredded mozzarella cheese.


Cover with foil and bake for 30 minutes. Remove foil and bake an additional 15 minutes. Let cool slightly before serving.

Apple Slump Recipe – Use up all of your fall apples


Have you ever taken a recipe out of a magazine or a book expecting it to be one of the best recipes you have ever made? If you answered yes, then you will understand the next question. Did that recipe totally suck? I’m sure you have experienced this at least once in your life. You see something that sounds so good on paper, and yet it completely fails to deliver in the end. Most of the time it usually sucks because it’s too bland. This happened to me quite often when I was first learning to cook. I can honestly say that Allrecipes.com changed my life. When I first visited the site, it was the first time that I was actually able to see what others thought of a recipe and then I could decide whether or not to make the recipe based on that information. I am a huge fan of Allrecipes, and I spend a lot of time at that site.

Several years ago, my children came home with one of those lovely magazine fundraisers that the school puts on. I really dislike fundraisers. I understand why they are important, but it would be nice if we could opt out of all the drama and just mail a check. I have actually done that before and it worked out beautifully. But, back in 2008, I felt the need to actually order something, so I ordered Everyday with Rachael Ray. I must admit…I am not a huge fan of most of her recipes because they are a little strange. I prefer simple ingredients that aren’t going to cost me a fortune. I suppose that’s why I was drawn to her Apple Slump recipe. I had never heard of apple slump, but I knew I had a full bag of apples that needed to be used, so this looked like the perfect recipe. I tried it back then, using gluten-free flour, and it was fantastic. This was not one of those instances that I talked about above. It did not suck! So, when I came home from the grocery store yesterday with a big bag of apples, I immediately thought of this recipe. My Sous Chef, a.k.a. my son, and I made this dish together. He sliced all of the apples for me using my handy dandy corer, peeler, slicer machine. This recipe came together pretty quickly. If you don’t have one of those “apple thingys,” get one. It makes preparing apples for pies and other desserts really simple.

This recipe was copied from the 2008 issue of Everyday with Rachael Ray. The only adaptation that I made was to use gluten-free flour, but I recommend regular flour if you don’t require a special diet.

Apple Slump
Recipe from: Everyday with Rachael Ray
Printable Recipe

Ingredients:

2 tablespoons unsalted butter, plus 3 tablespoons chopped and chilled
2-1/4 pounds fuji or granny smith apples, peeled and chopped into small chunks
1/2 cup plus 2 tablespoons sugar
Juice of 1 lemon
1/2 teaspoon ground cinnamon
1 cup plus 1 tablespoon flour (gluten-free or regular)
1 teaspoon baking powder
1/2 teaspoon baking soda
1/4 teaspoon salt
2/3 cup whole milk


Directions:

In a small skillet or Dutch oven, melt 2 tablespoons butter over medium heat and add the apples.


Then stir in 1/2 cup sugar, the lemon juice and cinnamon. Cover and simmer until the apples are nearly tender, about 8 minutes.


Stir in 1 tablespoon flour and remove from the heat.


In a medium bowl, combine the remaining 1 cup flour, 2 tablespoons sugar, the baking powder, baking soda and salt. Add the 3 tablespoons chilled butter, working it in with your fingertips until crumbly.


Add the milk and stir to combine.


Return the Dutch oven to medium-low heat and spoon the batter onto the hot fruit to almost cover the surface.


Cover and simmer until the batter is cooked through, about 20 minutes.

Previous Older Entries